Monday, August 18, 2014

Motorcycle Wheels

The wheels on this motorcycle turned out to be a bit of a work.  The picture below shows the condition from when I got the bike.  The rims and spokes all very rusted.  I had a hard time deciding what I wanted to do with these.  Do I pay the high cost to have the chrome re-plated?  Maybe look for used wheels in better condition, or swap them out for something else? Or just blast off the chrome and paint them?


I decided that chrome plating was too expensive, and I did not want to just paint the wheels like most other garage builds, so I started to look for alternatives.  In my searching I found mikesxs where you can find a variety of aluminum vintage style rims for a reasonable price.  These looked to be a good option.  Aluminum polishes to a nice finish and is lighter than the stock chrome plated steel rims.  The Rims I bought were one size wider than the stock rims – So I went from 1.5” to 1.85” in the front and 1.85” to 2.15” in the back.  My plan was to use the stock size tires on these rims, so that the wheels will still fit between the forks and fenders.  Plus, the tire will be stretched wider on the rim which should reduce tire roll when cornering.
The first thing I needed to do was to remove the tires and take apart the wheels so I could clean up the front and rear wheel hubs, and brake parts. 


After cleaning up the wheel hubs and polishing out all the oxidation, I decided to put a clear coat on the hubs knowing that it is hard to get into the crevices to maintain a clean look once the wheels are put together.  With the parts ready to go, it was time to begin lacing the rims with my new sets of chrome plated spokes.  


Lacing the wheels was trickier than I thought it would be.  If you don’t start in the right hole, or if you don’t put them in the exact order, they do not fit right.  Even with looking at pictures of completed rims, this took a while for me to get it right.  Below are the pictures of the process for the front wheel: 


After just completing the front, the back wheel went together much quicker for me.  Now both rims were laced up and I was ready to tighten the spokes and true them up. 


I started by setting up the wheel on my stand, and did my best to evenly hand tighten each spoke all the way around the rim. Next, I put a dial indicator on the side of the rim and measured the runout.  I went around adjusting the spokes with the 6mm wrench until I got this within about .05” of runout. 


Next I checked for hub to rim concentricity by setting the dial indicator on the bottom of the rim.  I went around again many times, tightening and loosening until I reduced the play to about .05”. 

Now that I was close to true, I wanted to make sure I had the spokes torqued to the proper specification.  The manual calls for 1.1 – 1.5 ft-lbs for the wheel spokes.  I did not have a proper spoke torque wrench but I was able to get in the ballpark using a force gauge.  The force gauge measures in lbs, so I can get the torque by multiplying that with the perpendicular distance the force is being applied.  I converted the spec to Inch lbs, and measured the length of my wrench.  Then I used a wire to connect the force gauge to the end of the wrench and did my best to hold it perpendicular as I used it.  I went around the rim making sure none of the spokes were too tight, and then tightened the ones that were too loose.  


Of course now, I had to get the dial indicator set up again and true the rim up further.  Now I could do this, and I had a feel for how tight the spokes should be.  I repeated the runout and concentricity adjustments again until I had them within the tolerance specified in the manual (0.0197”).  

After the long painful process of truing the rims, I was now ready to mount the tires.  I set the tires in the sun for about 30 minutes to get them soft and pliable.  I accidently punctured one of the new inner tubes when mounting the front tire, so I had to take it off, make a trip to the power sports store, pick up a new tube, and try again – more carefully.  Eventually I got the tires on.  I had a little bit of trouble getting the beads to pop up all the way around, so I sprayed them with Windex to lubricate the tire beads, inflated them until they seated, then let out some air so they were down to the correct pressure.  Now the wheels were done and ready to go. 

Saturday, July 12, 2014

Motorcycle Frame Refurbishing

Now that the engine was rebuilt, I started working on the frame.  I took off the few remaining parts, forks, tree, stem, and swing arm.  This view shows the frame looking at the bottom.  There was tons of dirt and grease all over 


To save time in cleaning off all the oil, dirt, and grease, I took the frame over to my buddy’s shop and borrowed his pressure washer.  I coated the thing with a whole can of degreaser, and then sprayed the thing down really good.  Even with that there were some really stubborn bits that required scraping with a scotch brite pad then repeating the pressure washing. Overall, this was a pretty easy way to clean up the frame.  


I brought the frame back to my workshop, cleaned up some of the smaller chassis parts, then set up all the parts for painting. 


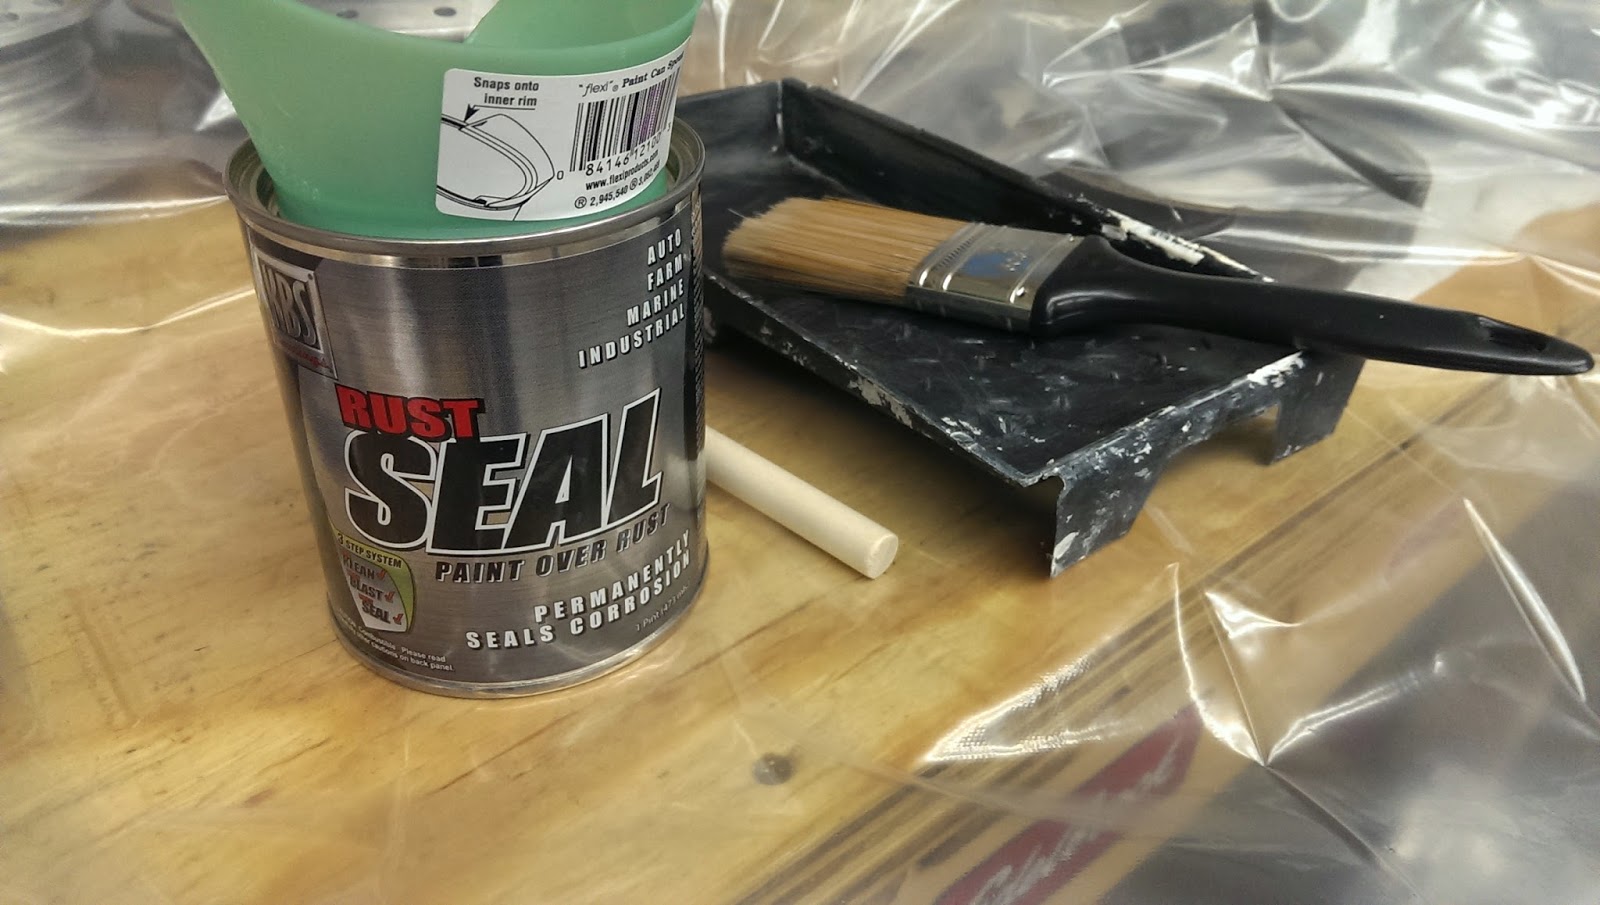
I used the KBS Coatings rust seal product as the base coat.  This stuff is supposed to encapsulate any remaining rust and do a real good job of sealing off the metal to keep out corrosion.  It can be sprayed on or brushed on.  A little goes a long way and it flows out so no brush strokes are visible.  

The results with just the rust seal coat look really good.  The only problem is that the rust seal paint is not resistant to ultra violet light, so it will start to fade if exposed to prolonged sunlight.  If you don’t want it to fade, it needs to be top coated.  


I let the rust seal coat dry for about 6 hours so it was dry to touch but just slightly tacky.  Then I sprayed DupliColor gloss black enamel doing 2 light coats and finishing with a medium/heavier coat. 

Here is how the finished parts turned out. 


Ideally, I could have got all these parts fully sand blasted and powder coated, but using the kbs coatings rust seal method with enamel top coat is a pretty durable alternative to powder coating and it cost significantly less money being able to do it yourself.

Tuesday, July 8, 2014

The CB360 Engine Rebuild

Over the winter I rebuilt the engine for the motorcycle.  I really enjoyed this part of the project because engines fascinate me.  It amazes me that they don’t wear out faster than they do.  Think about regular cruising speed an engine is probably around 3,000 RPMs that means that each piston is moving up and down inside the cylinder 50 times every second!  

I wanted to rebuild the engine for several reasons.  The first is that I had never done it before, and was up for the challenge.  The second reason was so that I could be confident the engine will be in great shape and last many years.  It makes it easier to clean everything up if it is taken apart too.  I could probably have just pressure washed it and it would look fine.  But, the second reason why I wanted to rebuild the engine is because I had never done it before.  It looked fun, and I was up for the challenge.

The first thing I did was took the valve cover off and the clutch cover to drain the remaining oil.  

With the valve cover and rocker arms off, the camshaft can be removed.  In this engine, the camshaft does not have any bearings; it just rides on the aluminum with oil being pumped between the camshaft and the aluminum surface.


Next, I removed the cylinder head.  You can see that there was a lot of carbon build-up.  I removed the valves and valve springs measured and checked them according to the manual.  One of the exhaust valves was pretty worn so I replaced both exhaust valves.  


From here I went to remove the cylinders.  These were stuck on really tight, I tried to free it by hitting a block of wood against the cylinders with a hammer – I accidently broke a fin doing this L
 Eventually it came free after hitting with a rubber mallet.

I used my calipers to check the valves, valve springs, and rocker arms pins, but in order to get accurate measurements on the cylinders,  I would need a bore gauge.  I took the cylinders and pistons to C&S Performance in Butler to have the bores and piston diameters measured.  When everything checked out in spec, I had them also hone the cylinders and soda blast the head and pistons to get rid of all the carbon.  They did a great job on everything and had pretty reasonable prices.  They are not really set up to do motorcycle engines (main focus is Chevy race engines), but they were friendly and willing to help me out anyway.  For the cylinders and head, I was given a great deal on powder coat by Classic Coatings Inc.  They did an amazing job and I could not be happier with how the parts turned out.

The next step in dis-assembly was to remove the clutch discs, oil pump, and filter rotor so that the cases can be split.  In order to get the oil rotor off, a special socket is needed.  It can be found online for pretty cheap but it I did not want to wait a week for a tool to arrive, So I found an old spark plug socket and used my angle grinder to make a crude oil rotor socket.  I used this with my impact driver and the filter rotor nut came right off.  

The engine/trans case was pretty disgusting and had lots of burnt oil baked on. 

Once I got the case split I took pictures so I would know how to put this puzzle back together. 
  I removed all the parts and laid them out trying to keep them organized.
 I spent lots of time cleaning up the case, taped them off, then gave the parts a fresh paint job using hi-temp aluminum colored paint.


Over the weeks of this engine rebuild, I also cleaned and polished up the aluminum valve cover, generator cover, and clutch cover.  I started with a soft wire wheel on my bench grinder for the really rough parts, otherwise I started with 400 grit wet sanding.  After wet sanding for as long as I could stand, I used a sisal wheel with emery compound and buffed the parts for a long time.  I also used a tiny felt wheel on my Dremel tool to get into the tight places.  Then I used rouge compound with a denim sewn buffing wheel to get them even smoother.  Then finally for the clutch cover and generator cover, I put a small wheel on my angle grinder and polished with white rouge to finish the parts off.  I could have done a better job, but I am happy with the results. 


Now with all the parts ready to go, the real fun part could happen, putting the engine together!  I got a complete gasket set and all new oil seals. 
I did not have a piston ring compressor so I used a makeshift one out of some thin sheet aluminum and large hose clamps.


And here is the completed engine.  For the final visual touch, I replaced all the Philips head screws with stainless steel Allen head screws.  I am very pleased with how it turned out.  


Saturday, July 5, 2014

Getting Started - The Tear Down

So the first step of a ground up restoration is to take all the parts off of the bike so that they can be cleaned or repaired.
Tank, Seat, Exhaust removed
When parts start coming off, you really notice how rusty and dirty everything is.


I took lots of pictures as I took things apart (so I could have a reference when it comes time to put this all back together), and I was also able to find a manual for the bike here.  This makes working on the bike a lot easier.  There are tear down and assembly steps for almost everything, as well as torques specs, part service limits, and exploded assembly views.

I tried my best to keep things relatively organized when I was taking things apart.

I was able to get the bike taken down pretty quick, and I felt like I was making progress.  At this point I left a few parts still on the frame.  

My main focus now was to get into the engine and make sure it was good.  I wanted to do this first before I put too much effort anywhere else because if the engine is no good, the rest of this bike is pretty dirty, that it would not really be worth restoring.  My next posts will start going through the engine rebuild.